After finishing the left wing, progress on the right wing has been going well. The skins were fitted to the jig, and then checked against the molds for correct trimming of the edges. We made adjustments to the jig that holds all of the wing parts in correct place for assembly, as the jig was set up for the left wing, and we had to switch it over to the right wing positions. We had to make new L brackets for the large pin that holds the spar brackets in place, as it was found that the L brackets for the left wing were not able to be used for the right wing (not usable for both left and right, as was thought earlier).
With this new L bracket, we then prepared the spar for bonding and bonded it to the bottom skin, along with the wing rib that is at the wing tip side of the wing. See images below of applying the bonding adhesive, and setting the spar in place.

Ron and Sam alighning the main spar for placement on the right wing
Head builder, Ron Burch, is shown below doing final cleanup of the Hysol bonding agent after the weights have been added to ensure good contact with the spar to the bottom skin. The excess bonding agent squeezes out, and we do a cleanup to remove any unnecessary Hysol to further reduce the weight of the assembly, and make the assembly as clean and simple as we can.

Ron does final inspection of main spar bonding
After the glue cured, we used the wing tip piece to establish the orientation for the last wing rib at the tip, and bonded that in place. Then we put the nut plates on that rib, and mounted the aileron fixed hinge bracket to the rib. The aileron is the moving portion of the wing that controls the banking of the aircraft. That allowed us to mount the aileron and establish the second aileron hinge position, which we glued in place temporarily to check proper hinging of the aileron, and also the hinging and position of the flap (big moving part of the wing that acts like brakes in the air). Image below is of the aileron fixed hinge bolted in place.
We had to adjust the position of the second aileron hinge several times to get it just right, but without too much effort, we got a perfect fit and drilled and bolted the hinge in position. See images below of the fitting of the aileron and flap (the flap has its top skin removed still).


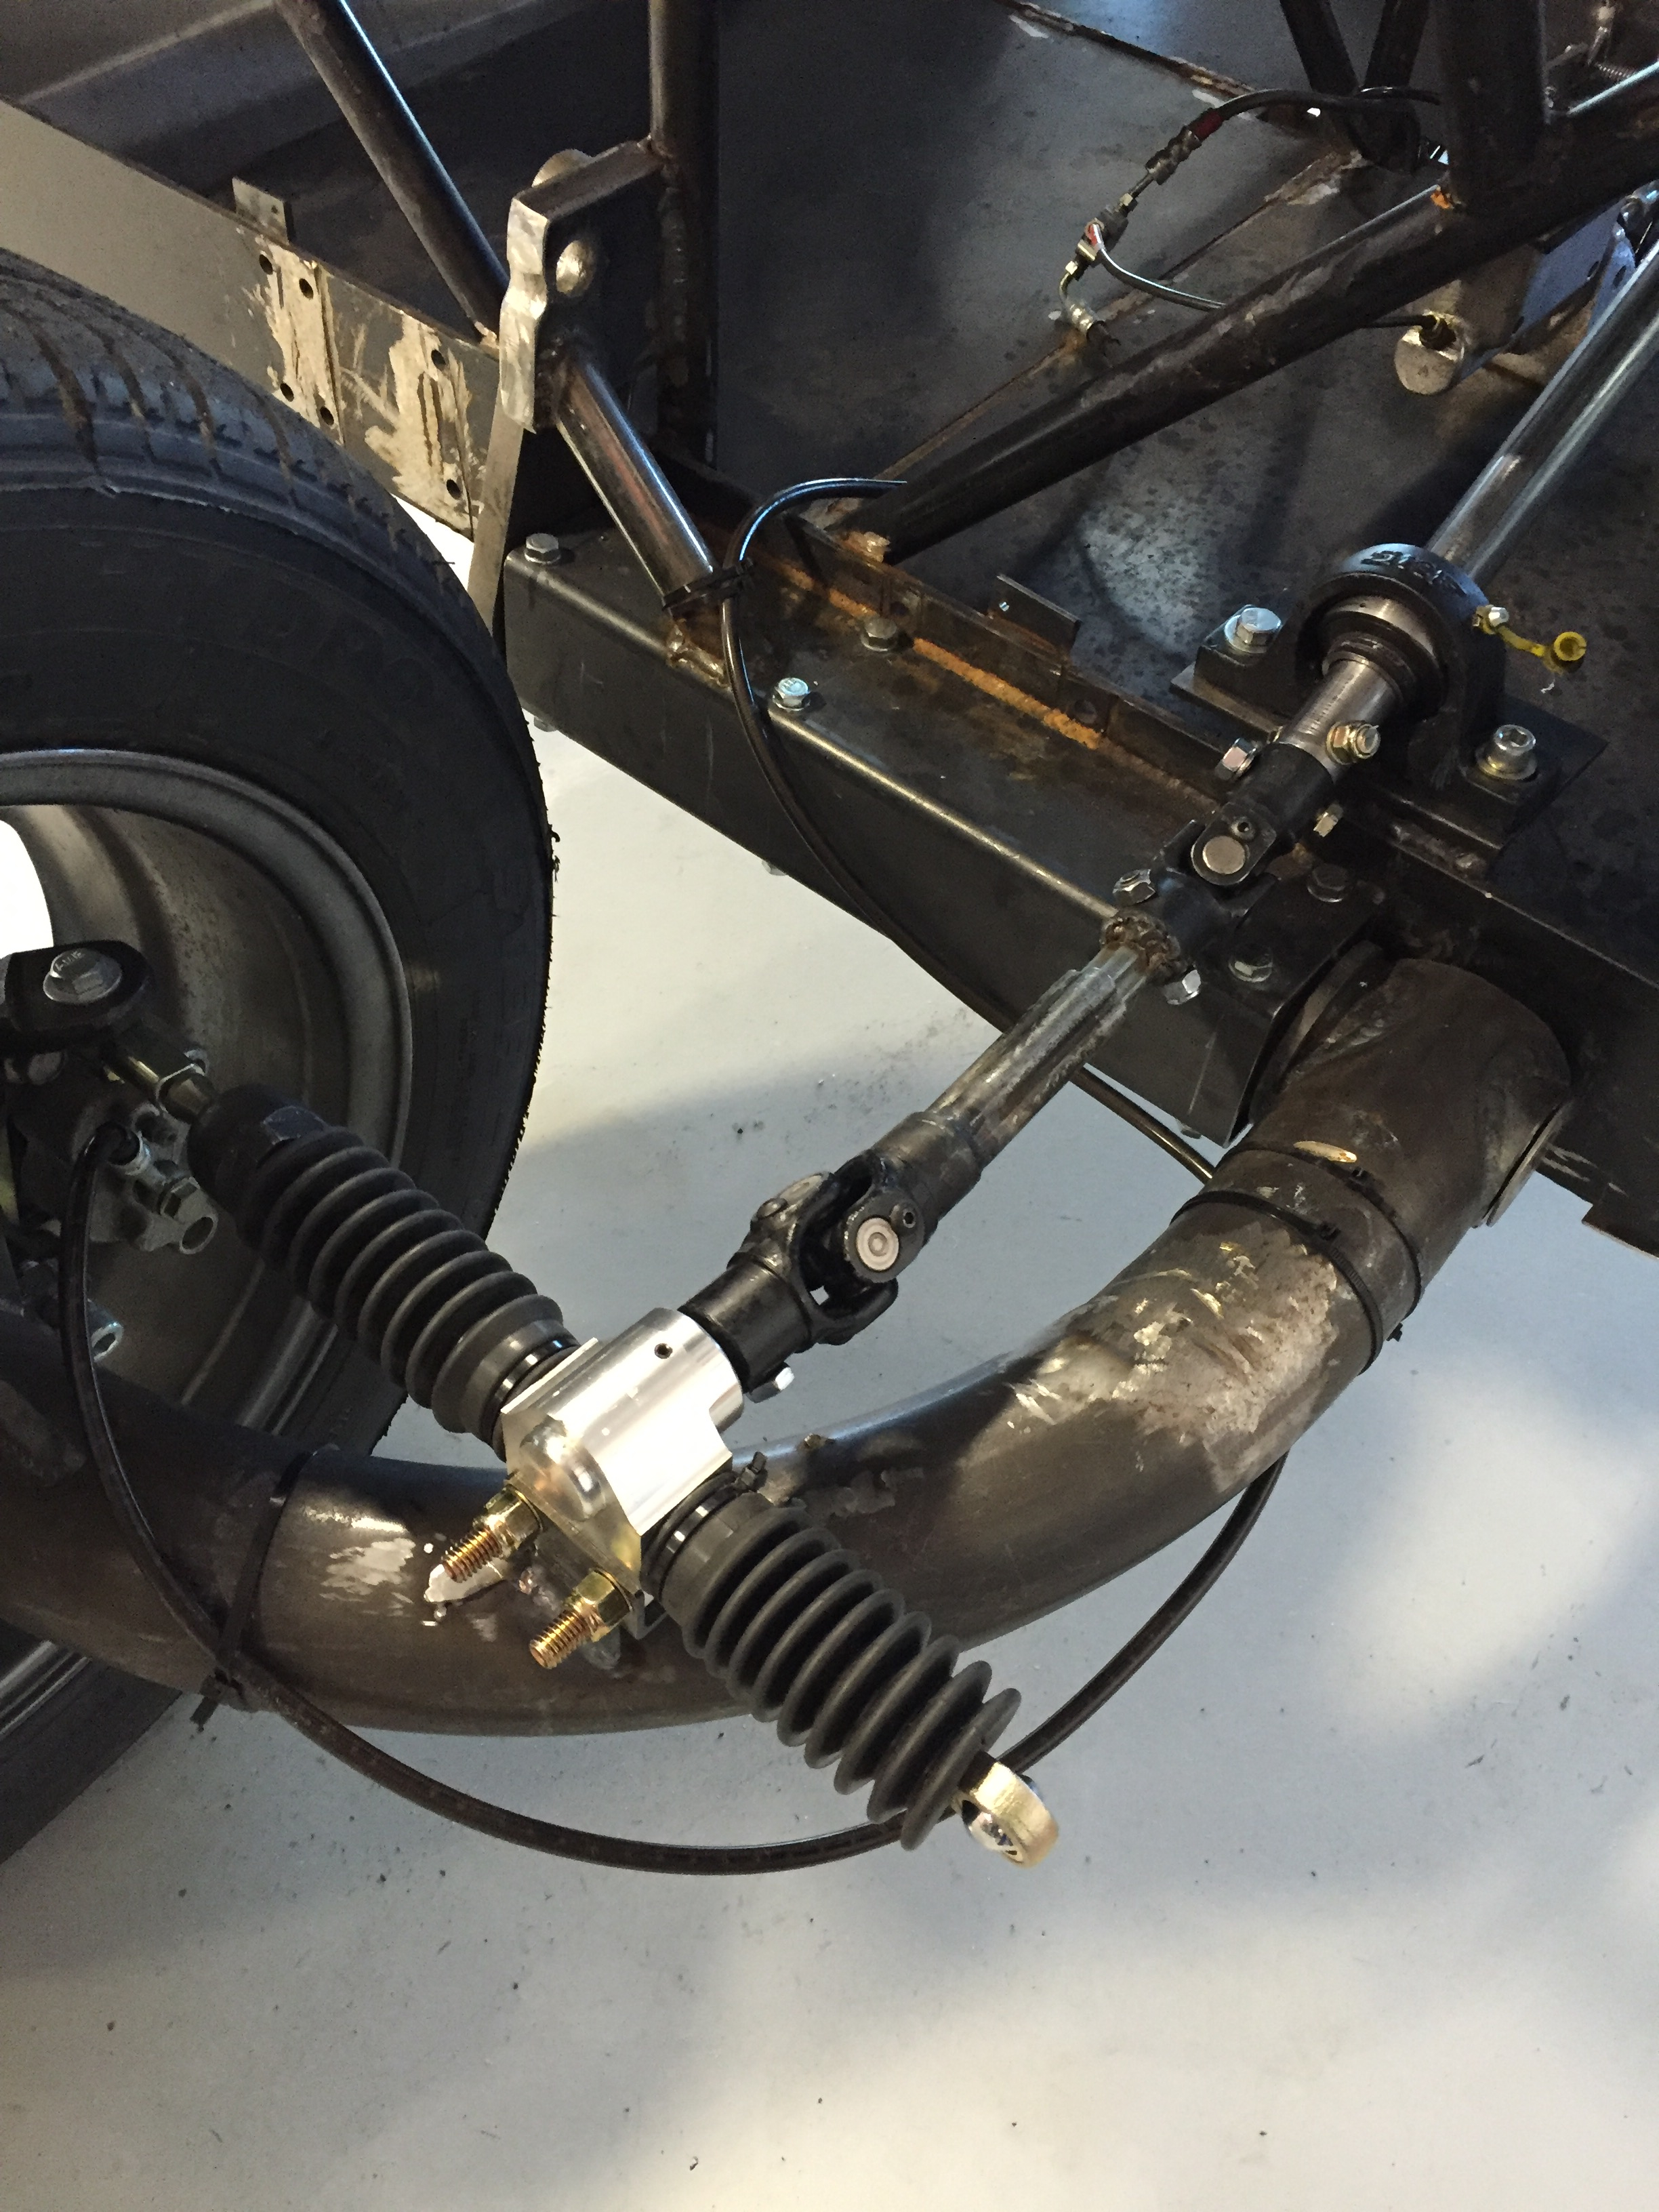
In addition to the wing build, we also found time to fabricate and mount the rack and pinion steering to the ground test prototype. The initial tests showed greatly increased steering precision, and almost effortless steering, even with the vehicle at rest. A non-moving vehicle is always hardest to turn the wheels. Having a vehicle with excellent, easy steering is very important. This means we won’t need to have heavy power steering added to the vehicle, and as a result of that, we saved another fifteen pounds. With the wing weight savings of over twenty pounds each, this provides a good amount of weight savings we can now put into things like extra fuel capacity – a much sought after feature by our Pre-flight buyers. It also gives us ample room for handling unexpected weight penalties for items that might end up heavier than anticipated. Below is an image of the rack and pinion installed on the front of the ground test prototype.
All-in-all, it has been a very good few weeks!